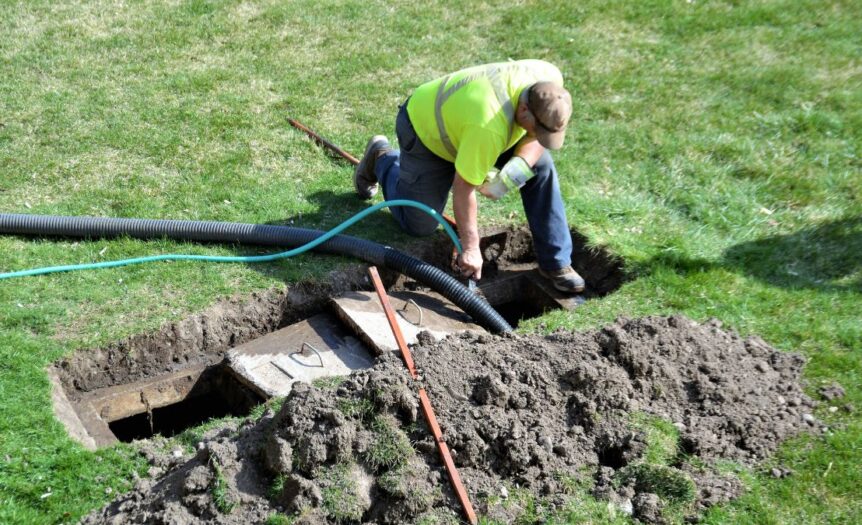
Maintaining a healthy septic system is crucial for any homeowner relying on one for their wastewater management. Among the key components that ensure its smooth operation are the filters, which prevent solids from entering the drain field and causing potential problems.
Let’s look at how to clean the filters in your septic tank and why it’s important to do so regularly.
Why Clean the Filters?
The filters in your septic tank play a crucial role in keeping it functioning properly. They trap solid materials and prevent them from clogging or damaging the drain field. Over time, these filters can become clogged with debris, and you must clean them to maintain effectiveness. Neglecting to clean them can lead to a backup of wastewater or even system failure, which can be expensive and time consuming.
When Should You Clean the Filters?
There’s no definitive answer to how often you should clean the filters in your septic tank. It depends on various factors, such as the size of your tank, the number of occupants in your household, and your usage habits. Generally, the recommendation is to clean it at least once every two to three years. However, if you notice any signs of a clogged filter, such as slow draining or unpleasant odors, it’s best to clean them immediately. Understand the average lifespan of a septic tank, and consider cleaning the filters more frequently as the tank ages.
How To Clean the Filters
- Locate the filters: The first step in cleaning your septic tank filters is to locate them. In most cases, they’re near the tank’s outlet baffle.
- Prepare the area: It’s important to take precautions when cleaning your septic tank filters. Wear protective gloves and clothing, and make sure to have a bucket or container nearby to collect any debris that may come out.
- Remove the filters: Gently lift the filters out of their housing. Depending on the type, you may need to unscrew or detach them from the housing unit.
- Clean the filters: Use a garden hose or pressure washer to remove debris and buildup from the filters. For stubborn areas, use a brush or soft cloth.
- Inspect and replace if necessary: Once cleaned, inspect the filters for tears or damage. If they’re beyond repair, replace them with new ones.
- Reinstall the filters: After cleaning and inspecting, carefully place them back into their housing unit and secure them.
- Dispose of debris properly: Properly dispose of the collected debris in a designated area, or follow your local guidelines for waste disposal.
Regularly cleaning the filters in your septic tank is a vital maintenance task you shouldn’t overlook. Following the steps outlined above, you can ensure your septic system operates efficiently and prevent costly and inconvenient failures. Remember that maintenance is key to prolonging the septic system’s lifespan and protecting your property and the environment. Always adhere to local regulations, and seek professional advice if you feel unsure about any aspect of your septic system’s maintenance.


 Deering Estate
 Massage Envy South Miami
 Calla Blow Dry
 My Derma Clinic
 Sushi Maki
 Sports Grill
 The Healthy Kitchen
 Golden Rule Seafood
 Malanga Cuban Café

 Kathleen Ballard
 Panter, Panter & Sampedro
 Vintage Liquors
 The Dog from Ipanema
 Rubinstein Family Chiropractic
 Your Pet’s Best
 Indigo Republic


 ATR Luxury Homes


 2112 Design Studio
 Hamilton Fox & Company
 Creative Design Services
 Best Pest Professionals
 HD Tree Services
 Trinity Air Conditioning Company
 Cisca Construction & Development
 Mosquito Joe
 Cutler Bay Solar Solutions


 Miami Royal Ballet & Dance
 Christopher Columbus
 Pineview Preschools
 Westminster
 Carrollton
 Lil’ Jungle
 Frost Science Museum
 Palmer Trinity School
 South Florida Music
 Pinecrest Orthodontics
 Dr. Bob Pediatric Dentist
 d.pediatrics
 South Miami Women’s Health

 The Spot Barbershop
 My Derma Clinic


 Miami Dance Project

 Rubinstein Family Chiropractic
 Indigo Republic

 Safes Universe
 Vintage Liquors
 Evenings Delight


 Atchana’s Homegrown Thai
 Baptist Health South Florida

 Laser Eye Center of Miami
 Visiting Angels
 OpusCare of South Florida

 Your Pet’s Best


 HD Tree Services
 Hamilton Fox & Company


 Creative Design Services